Joplin Publisher
Introduction
Publish Joplin notes to GitHub, and automate the build and deployment process using GitHub Actions.
Usage
GitHub
- If you haven't already, sign up for a GitHub account.
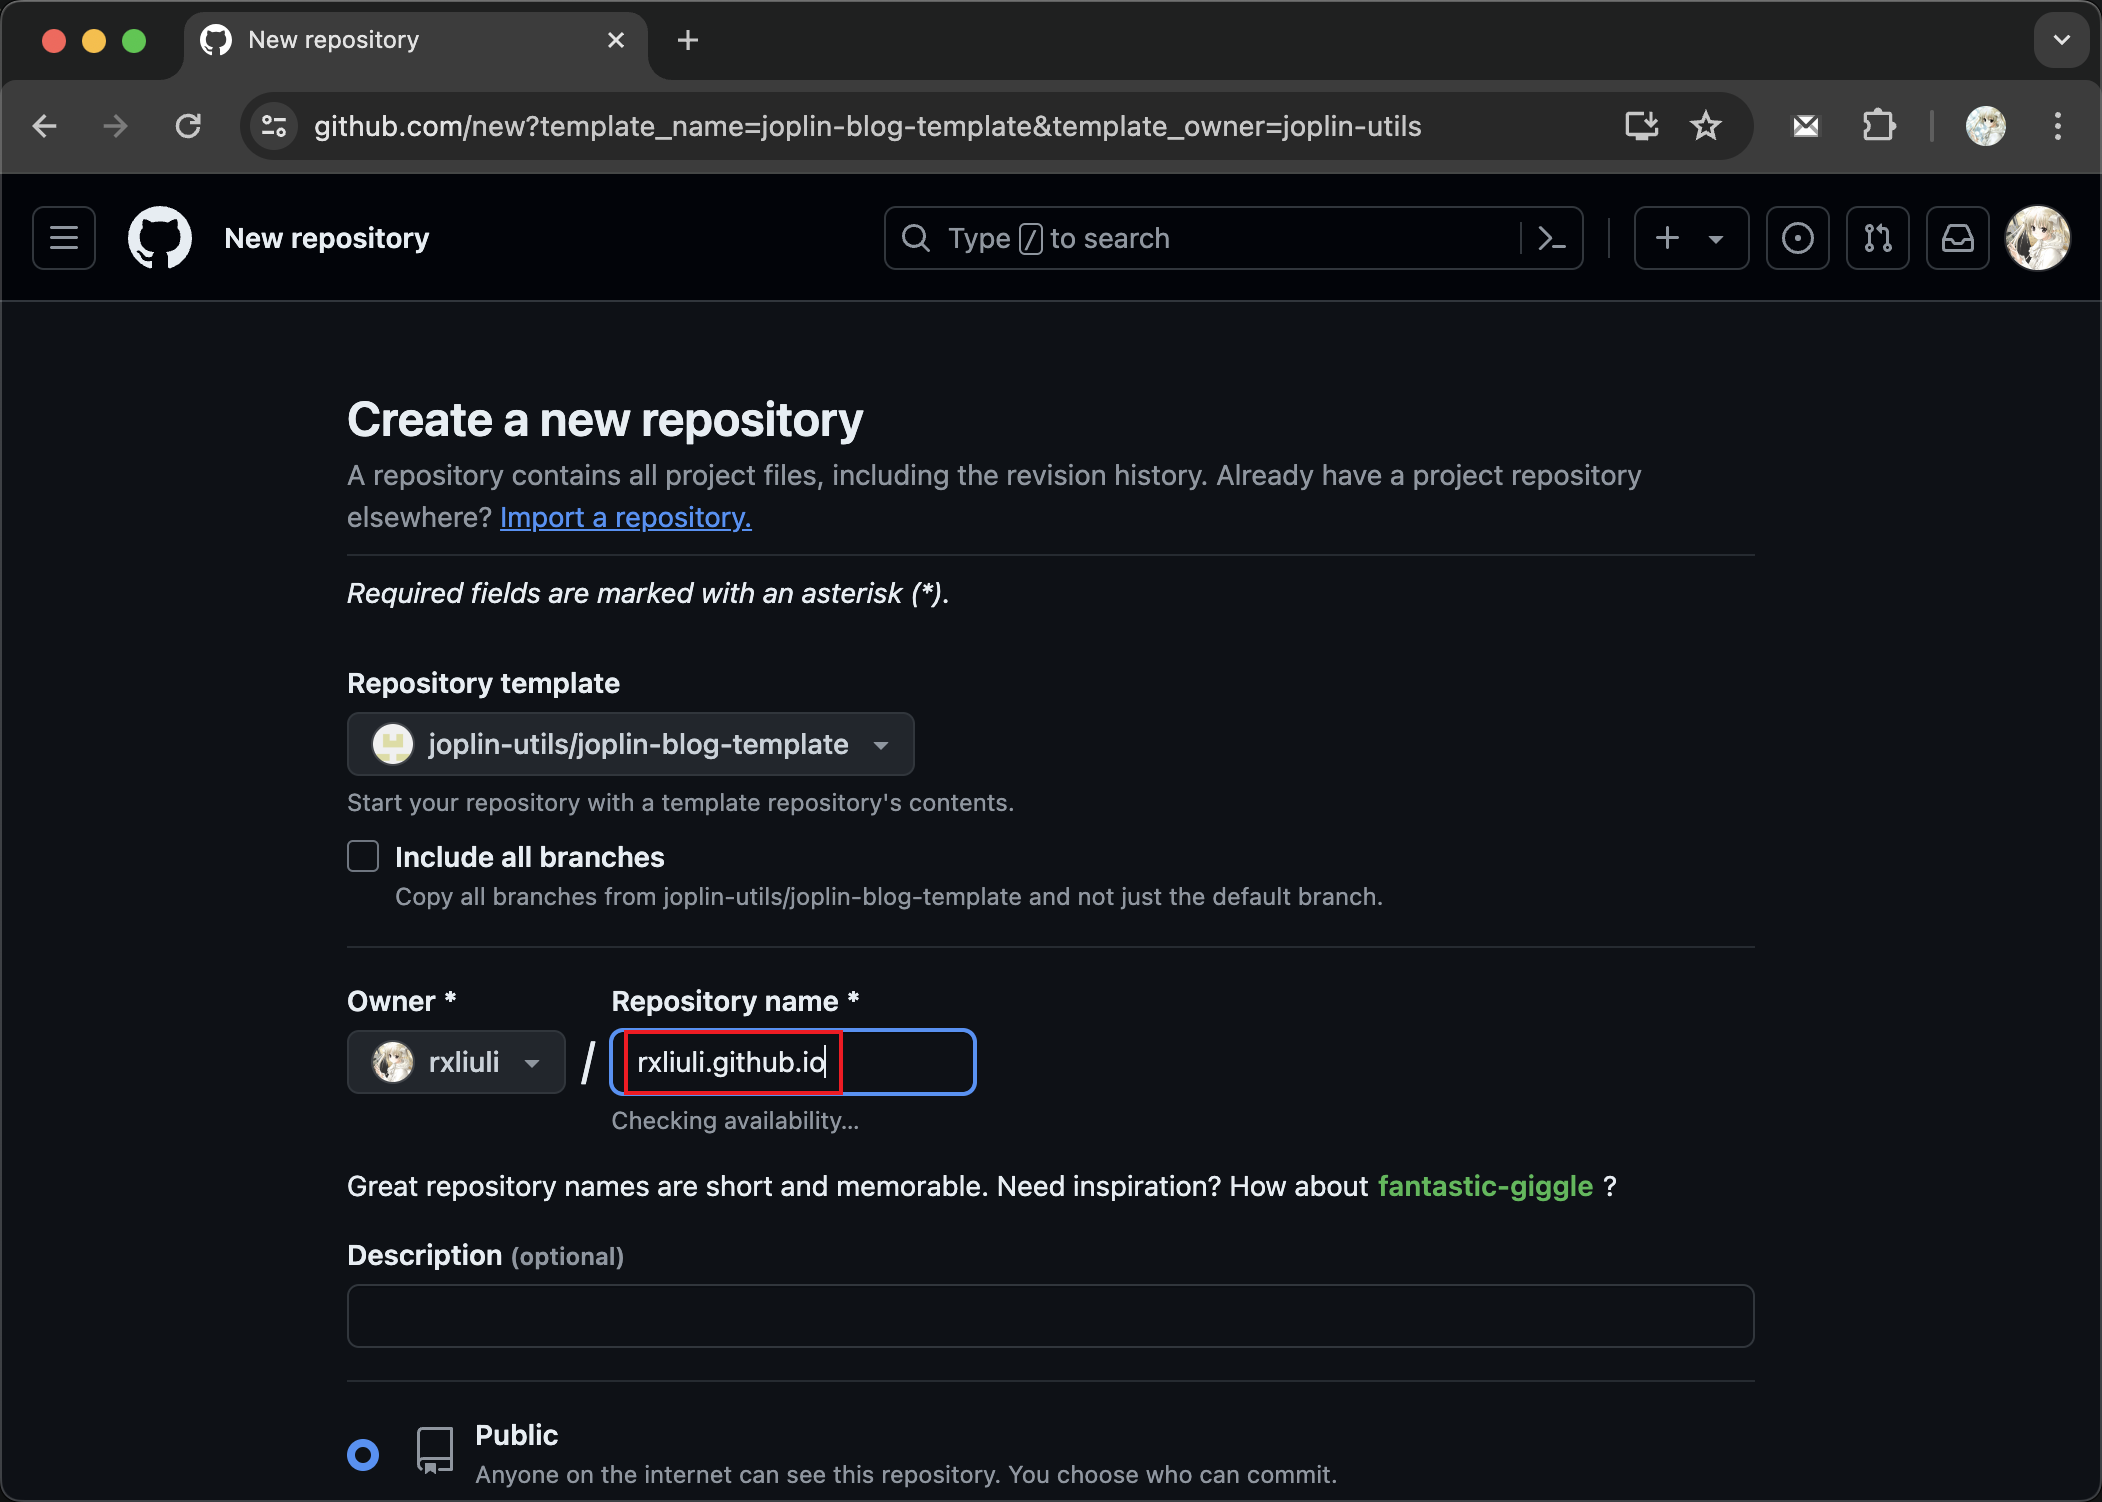
- Use the template project joplin-blog-template to create a new repository named
<github username>.github.io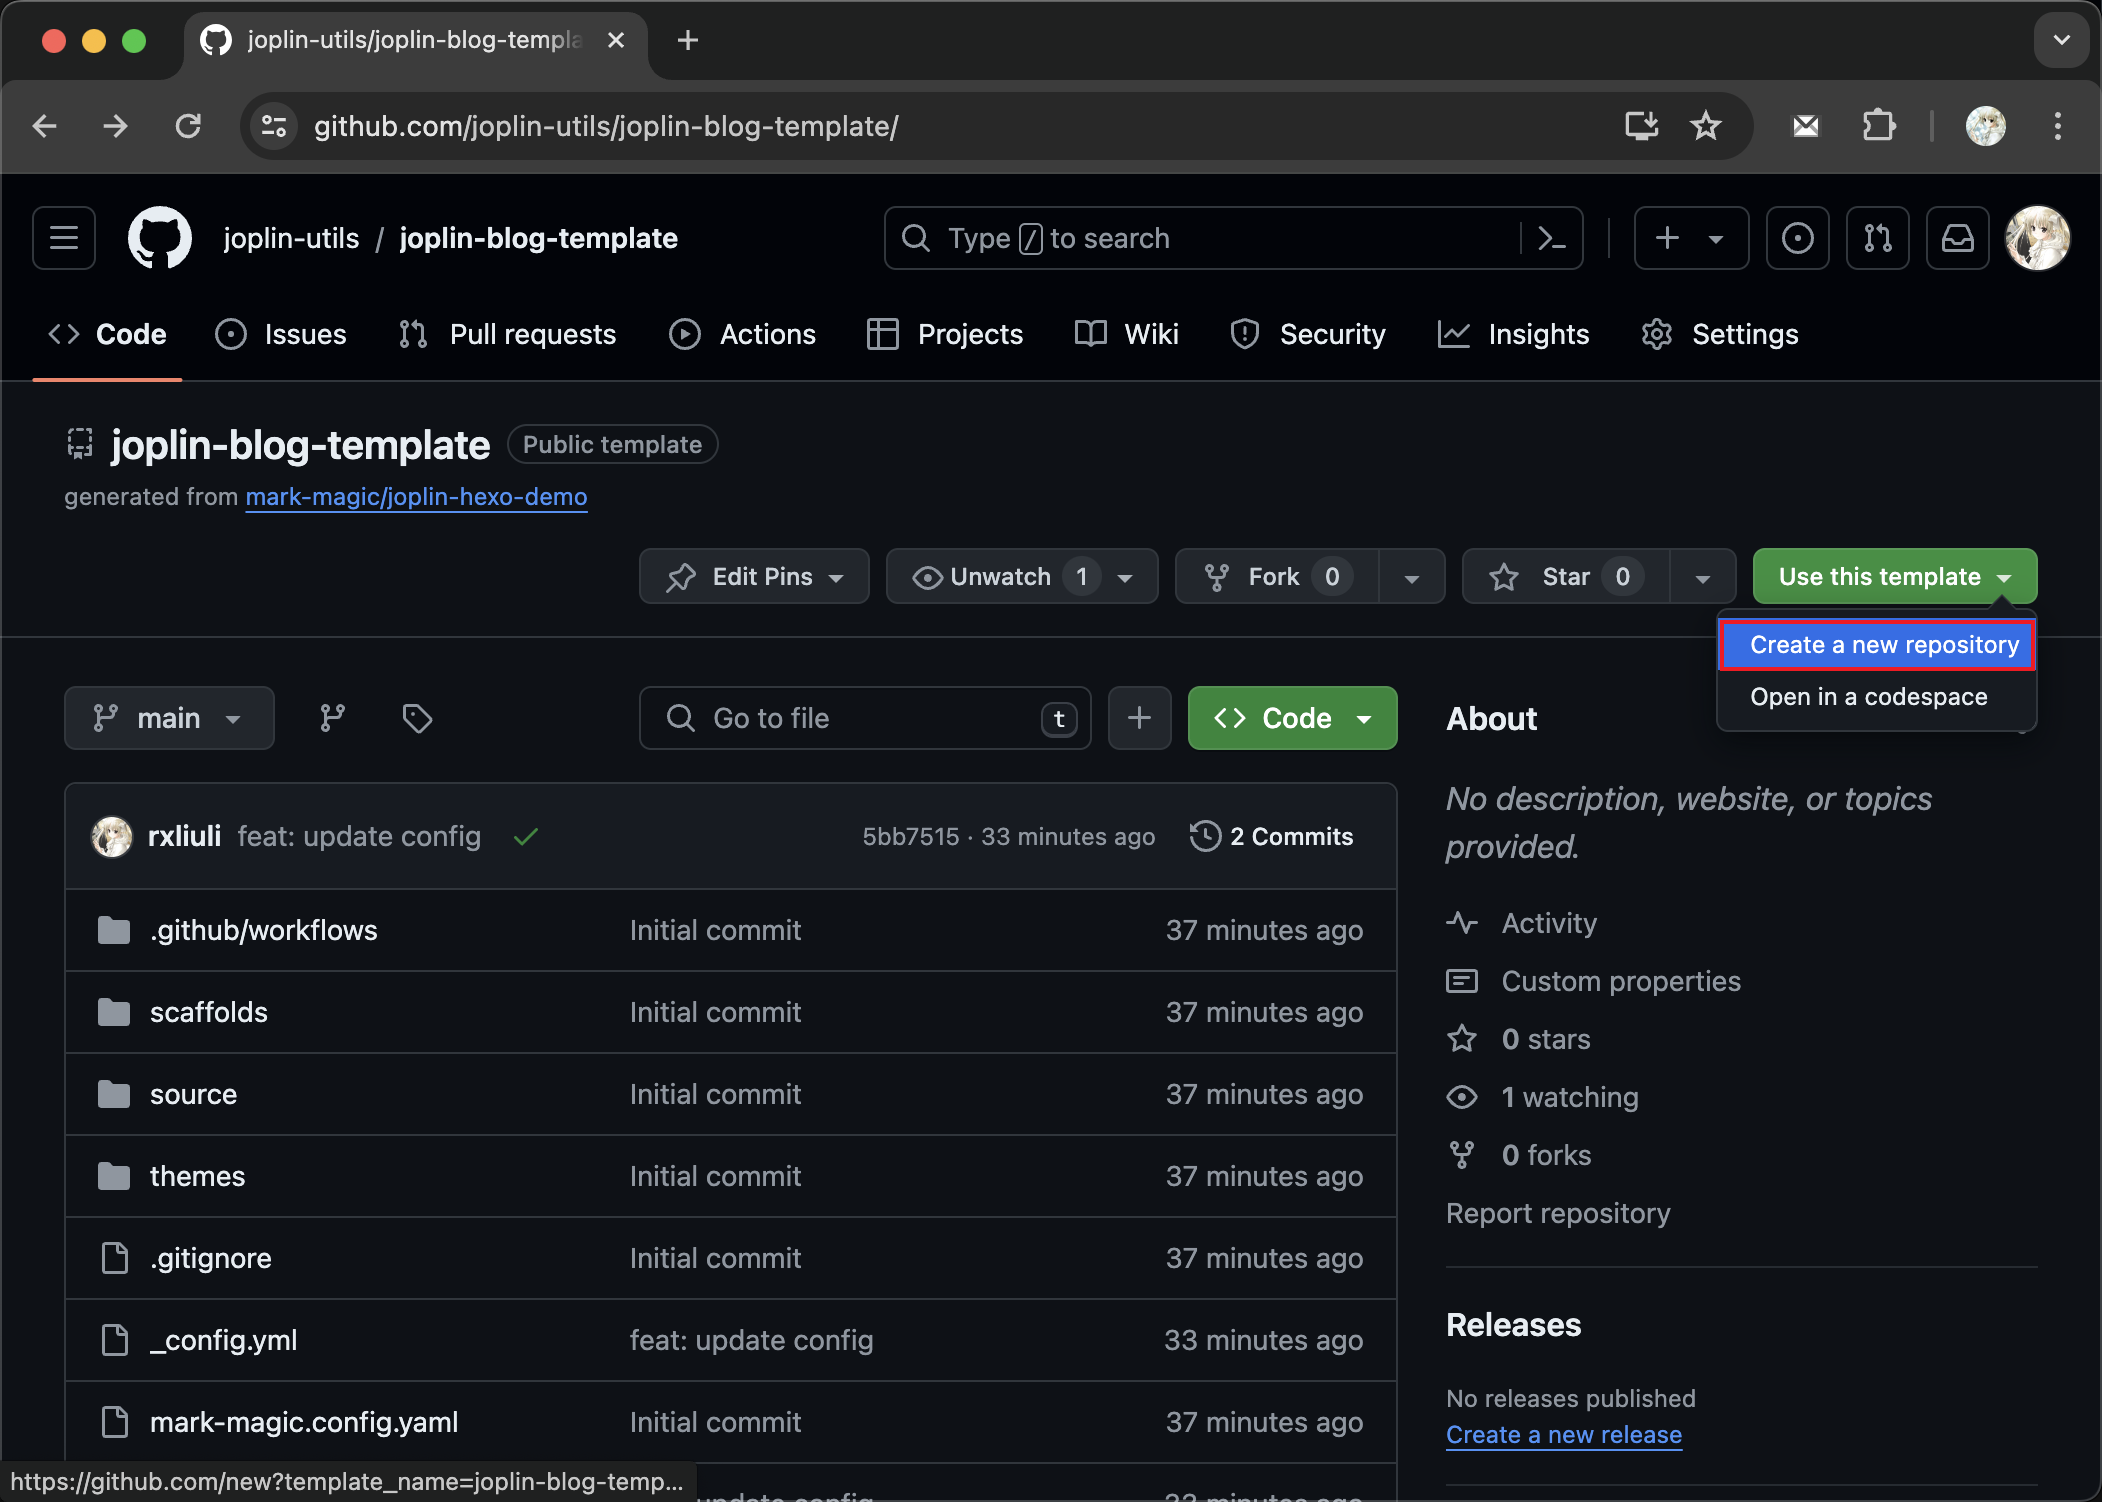

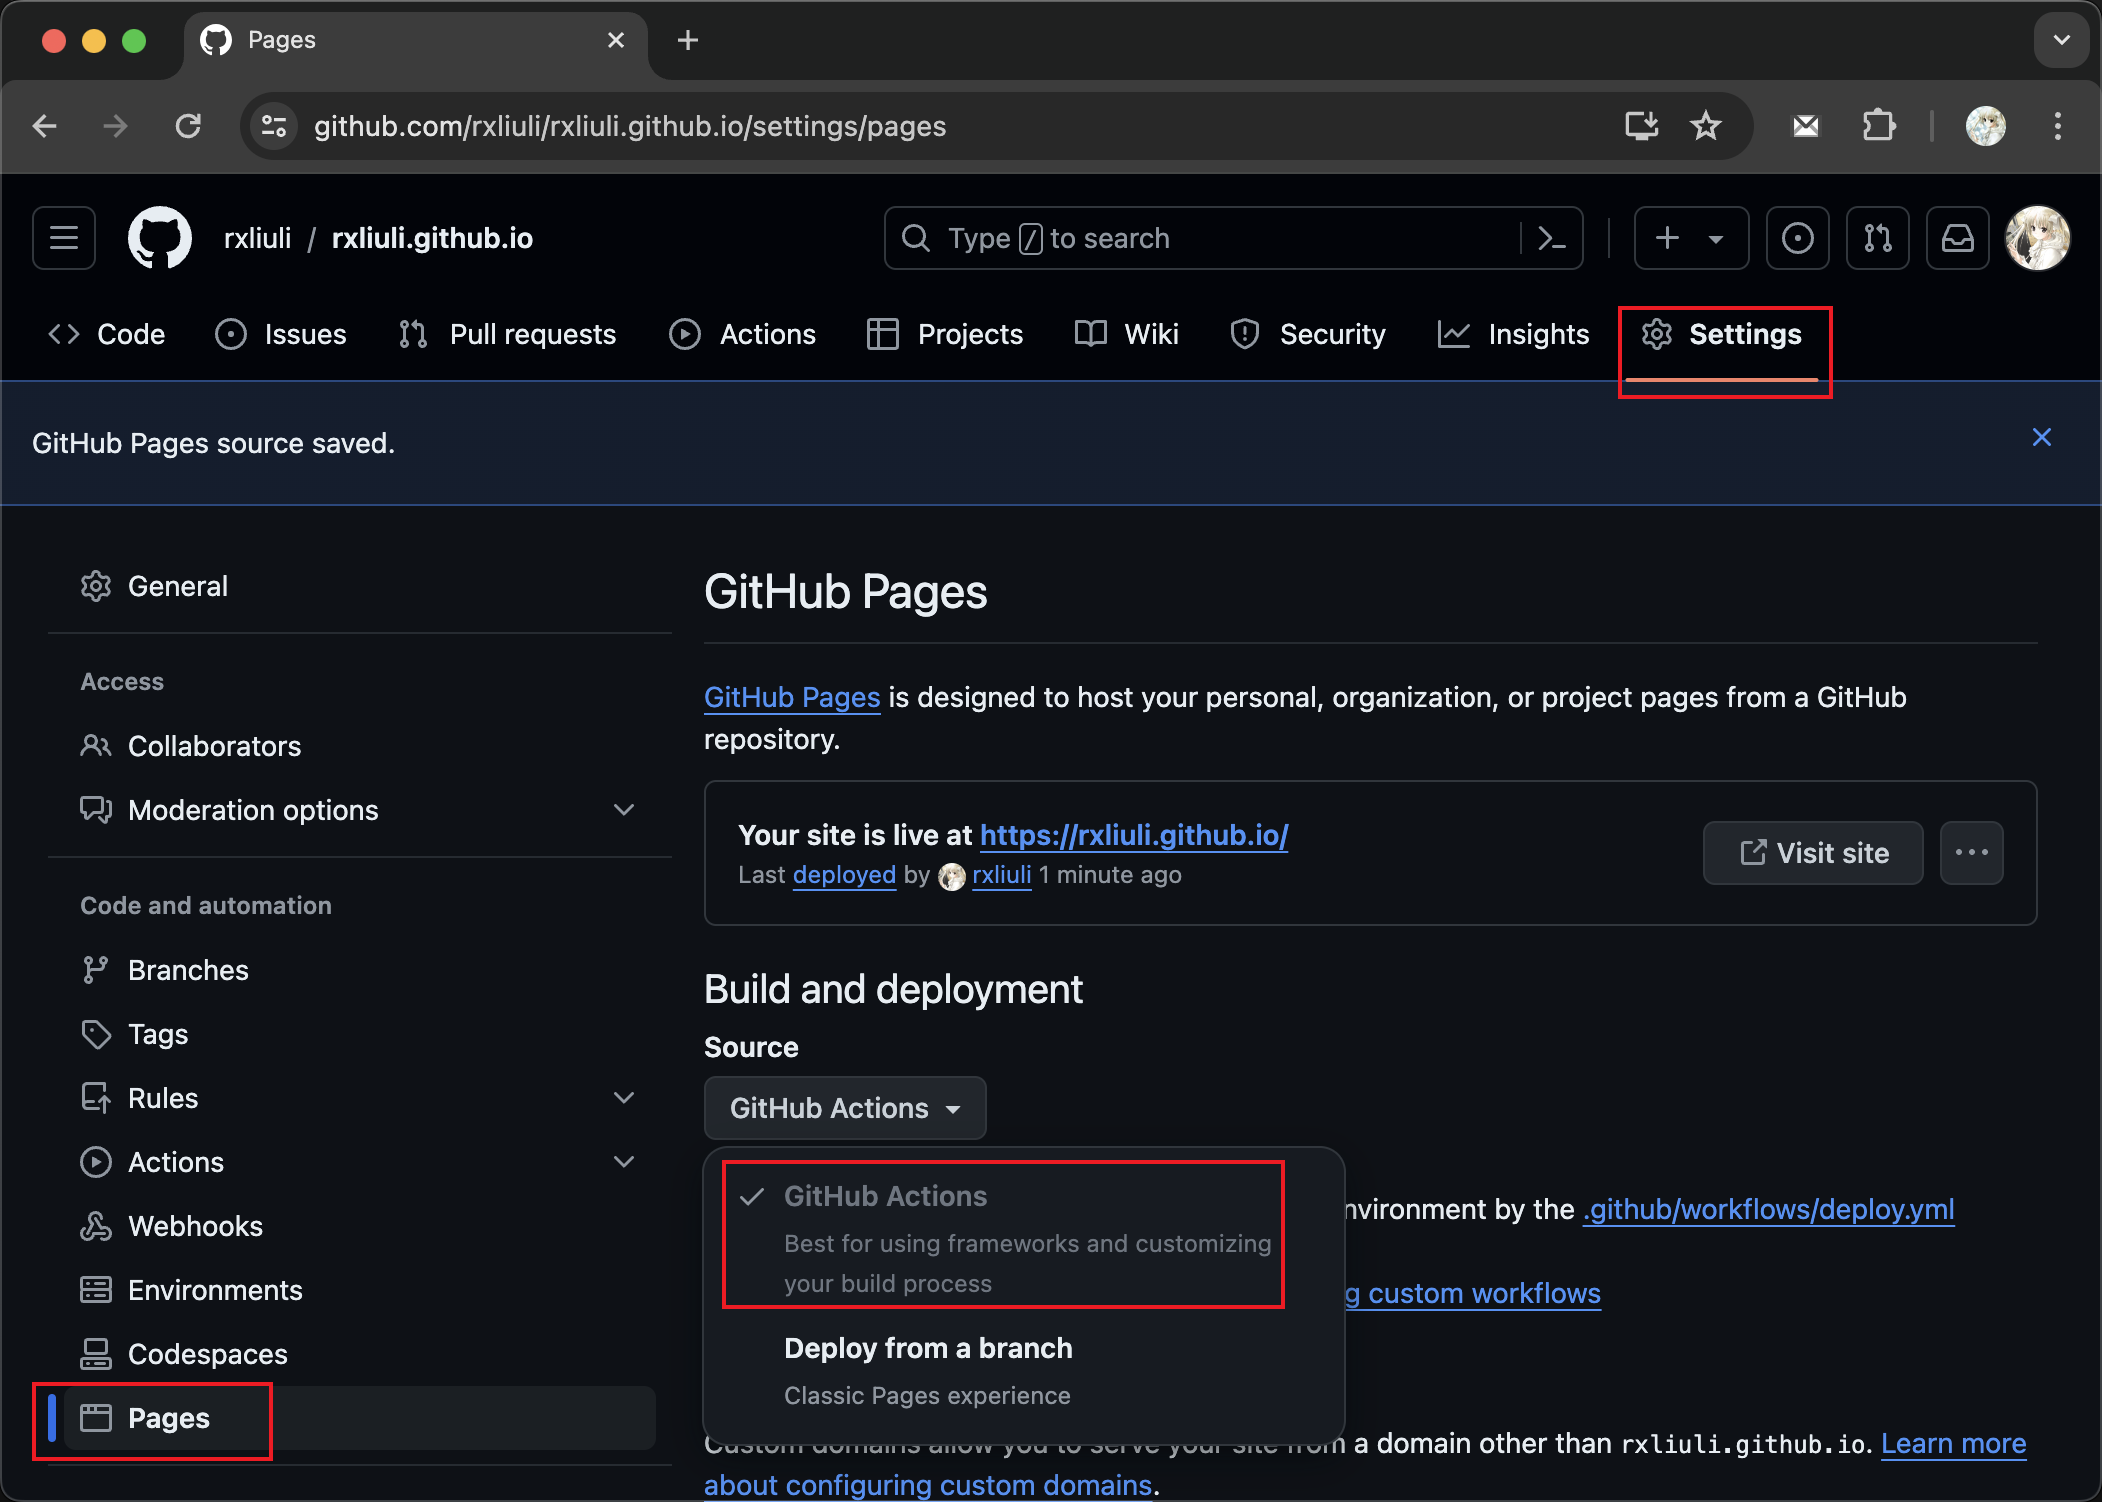
- Navigate to Settings > Pages > Build and deployment, and select GitHub Actions
- Create a GitHub token, selecting at least the content and
<github username>.github.iorepository permissions. Copy the token after creation.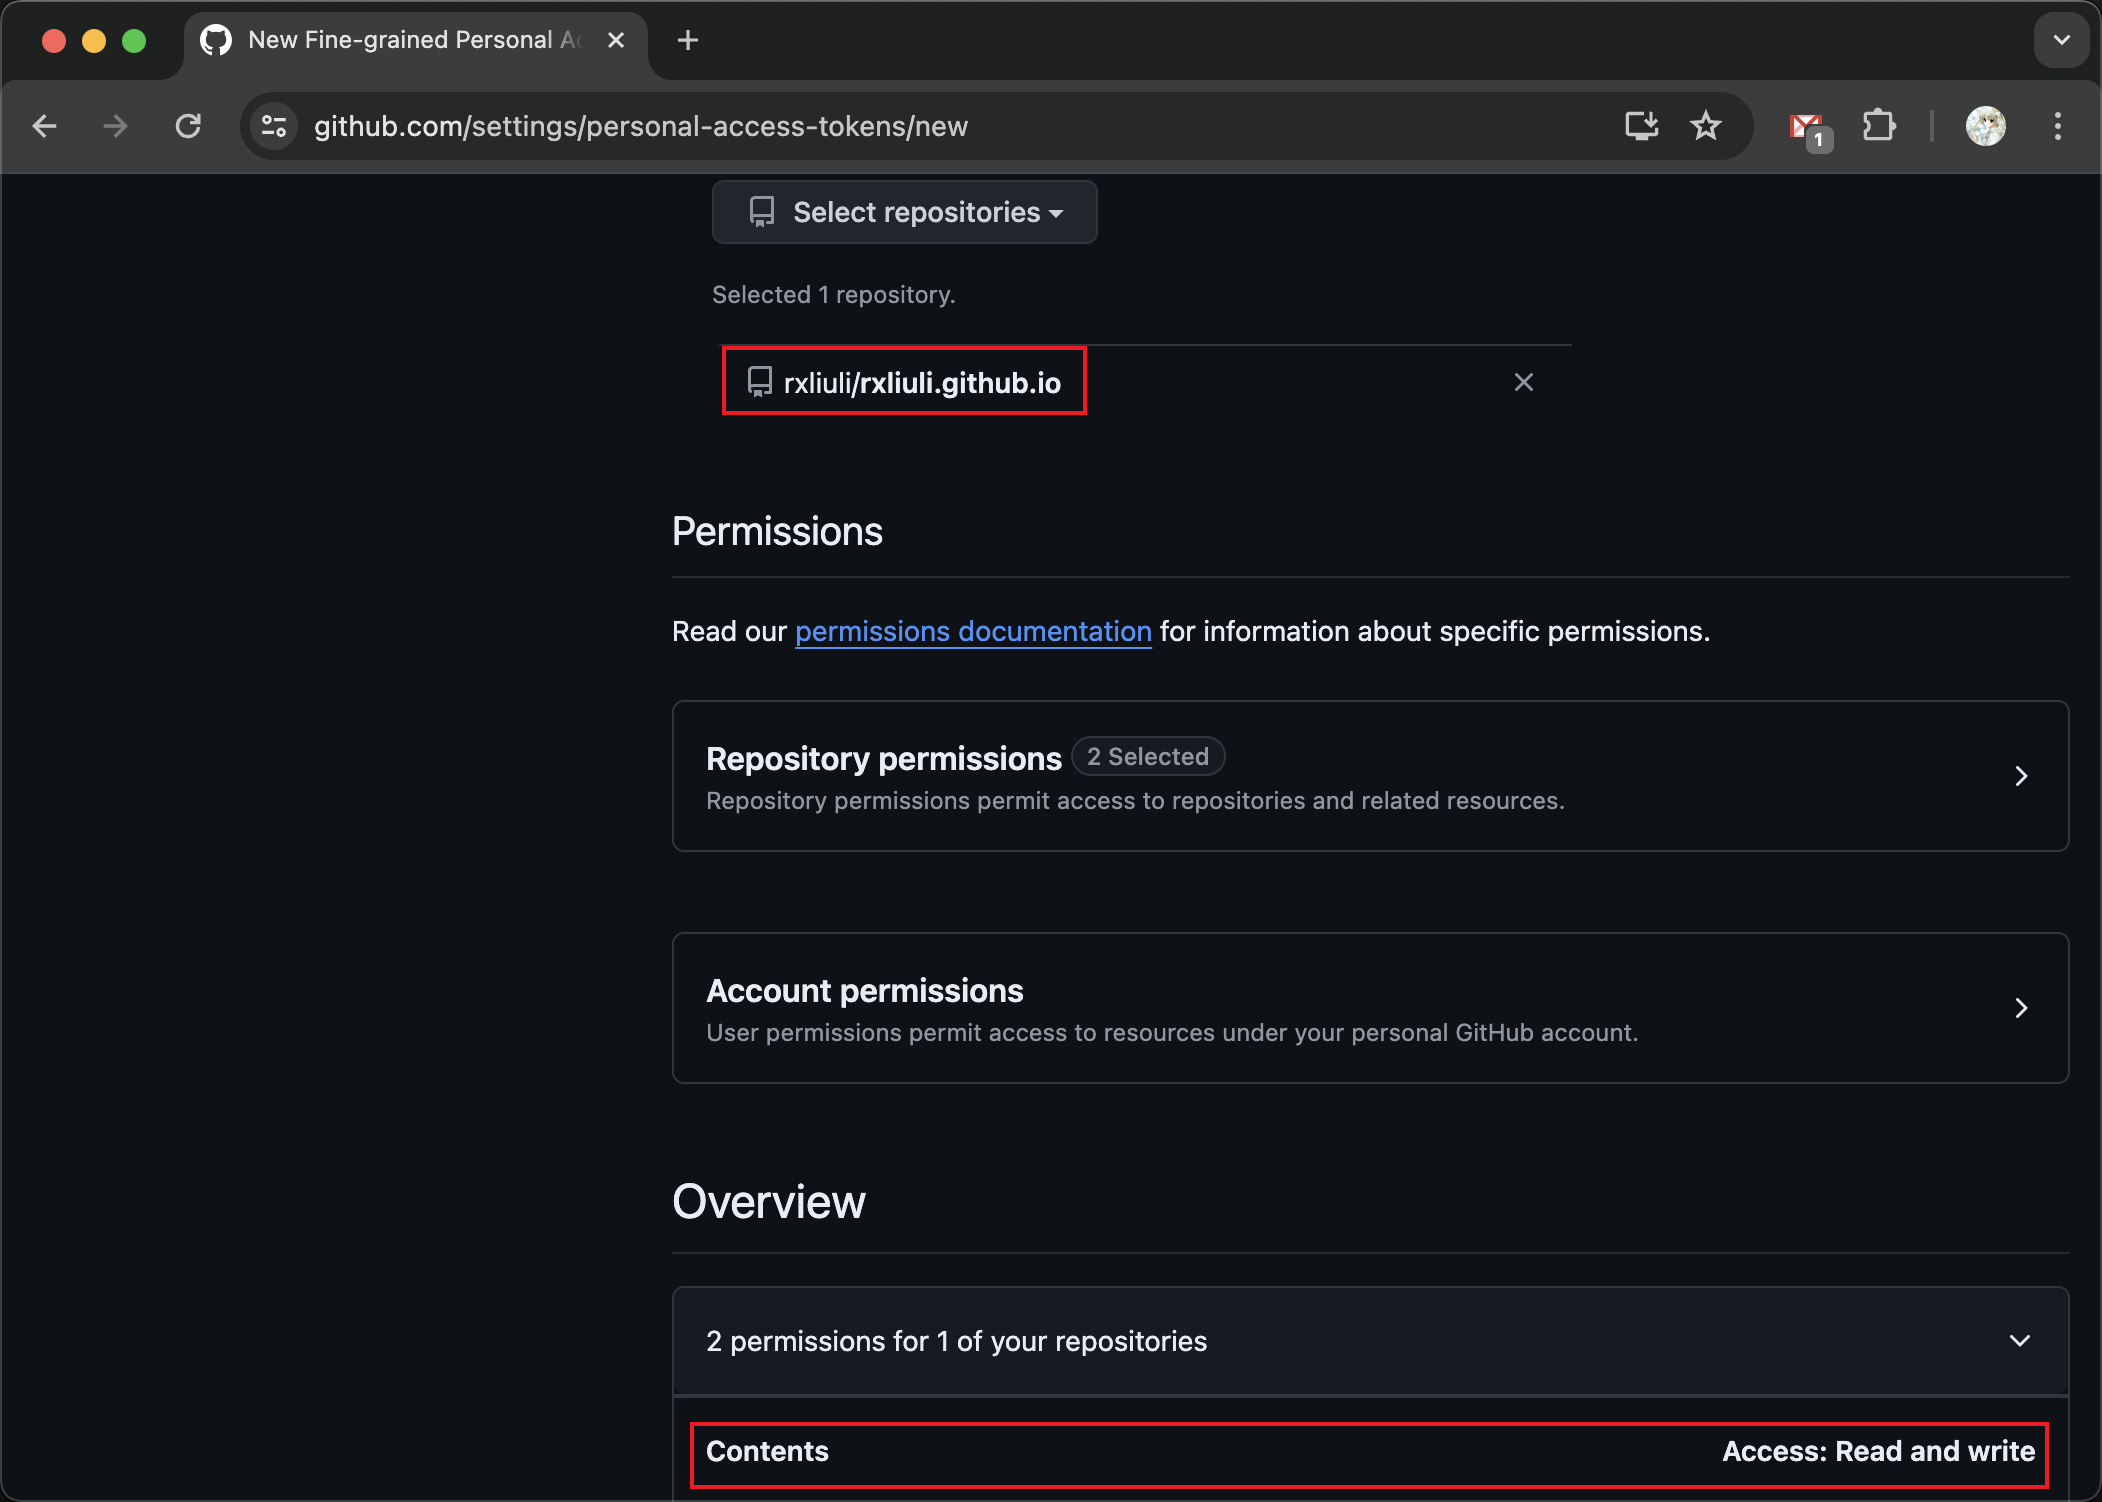
Joplin
- Install the plugin, https://joplinapp.org/plugins/plugin/rxliuli.joplin-publisher/
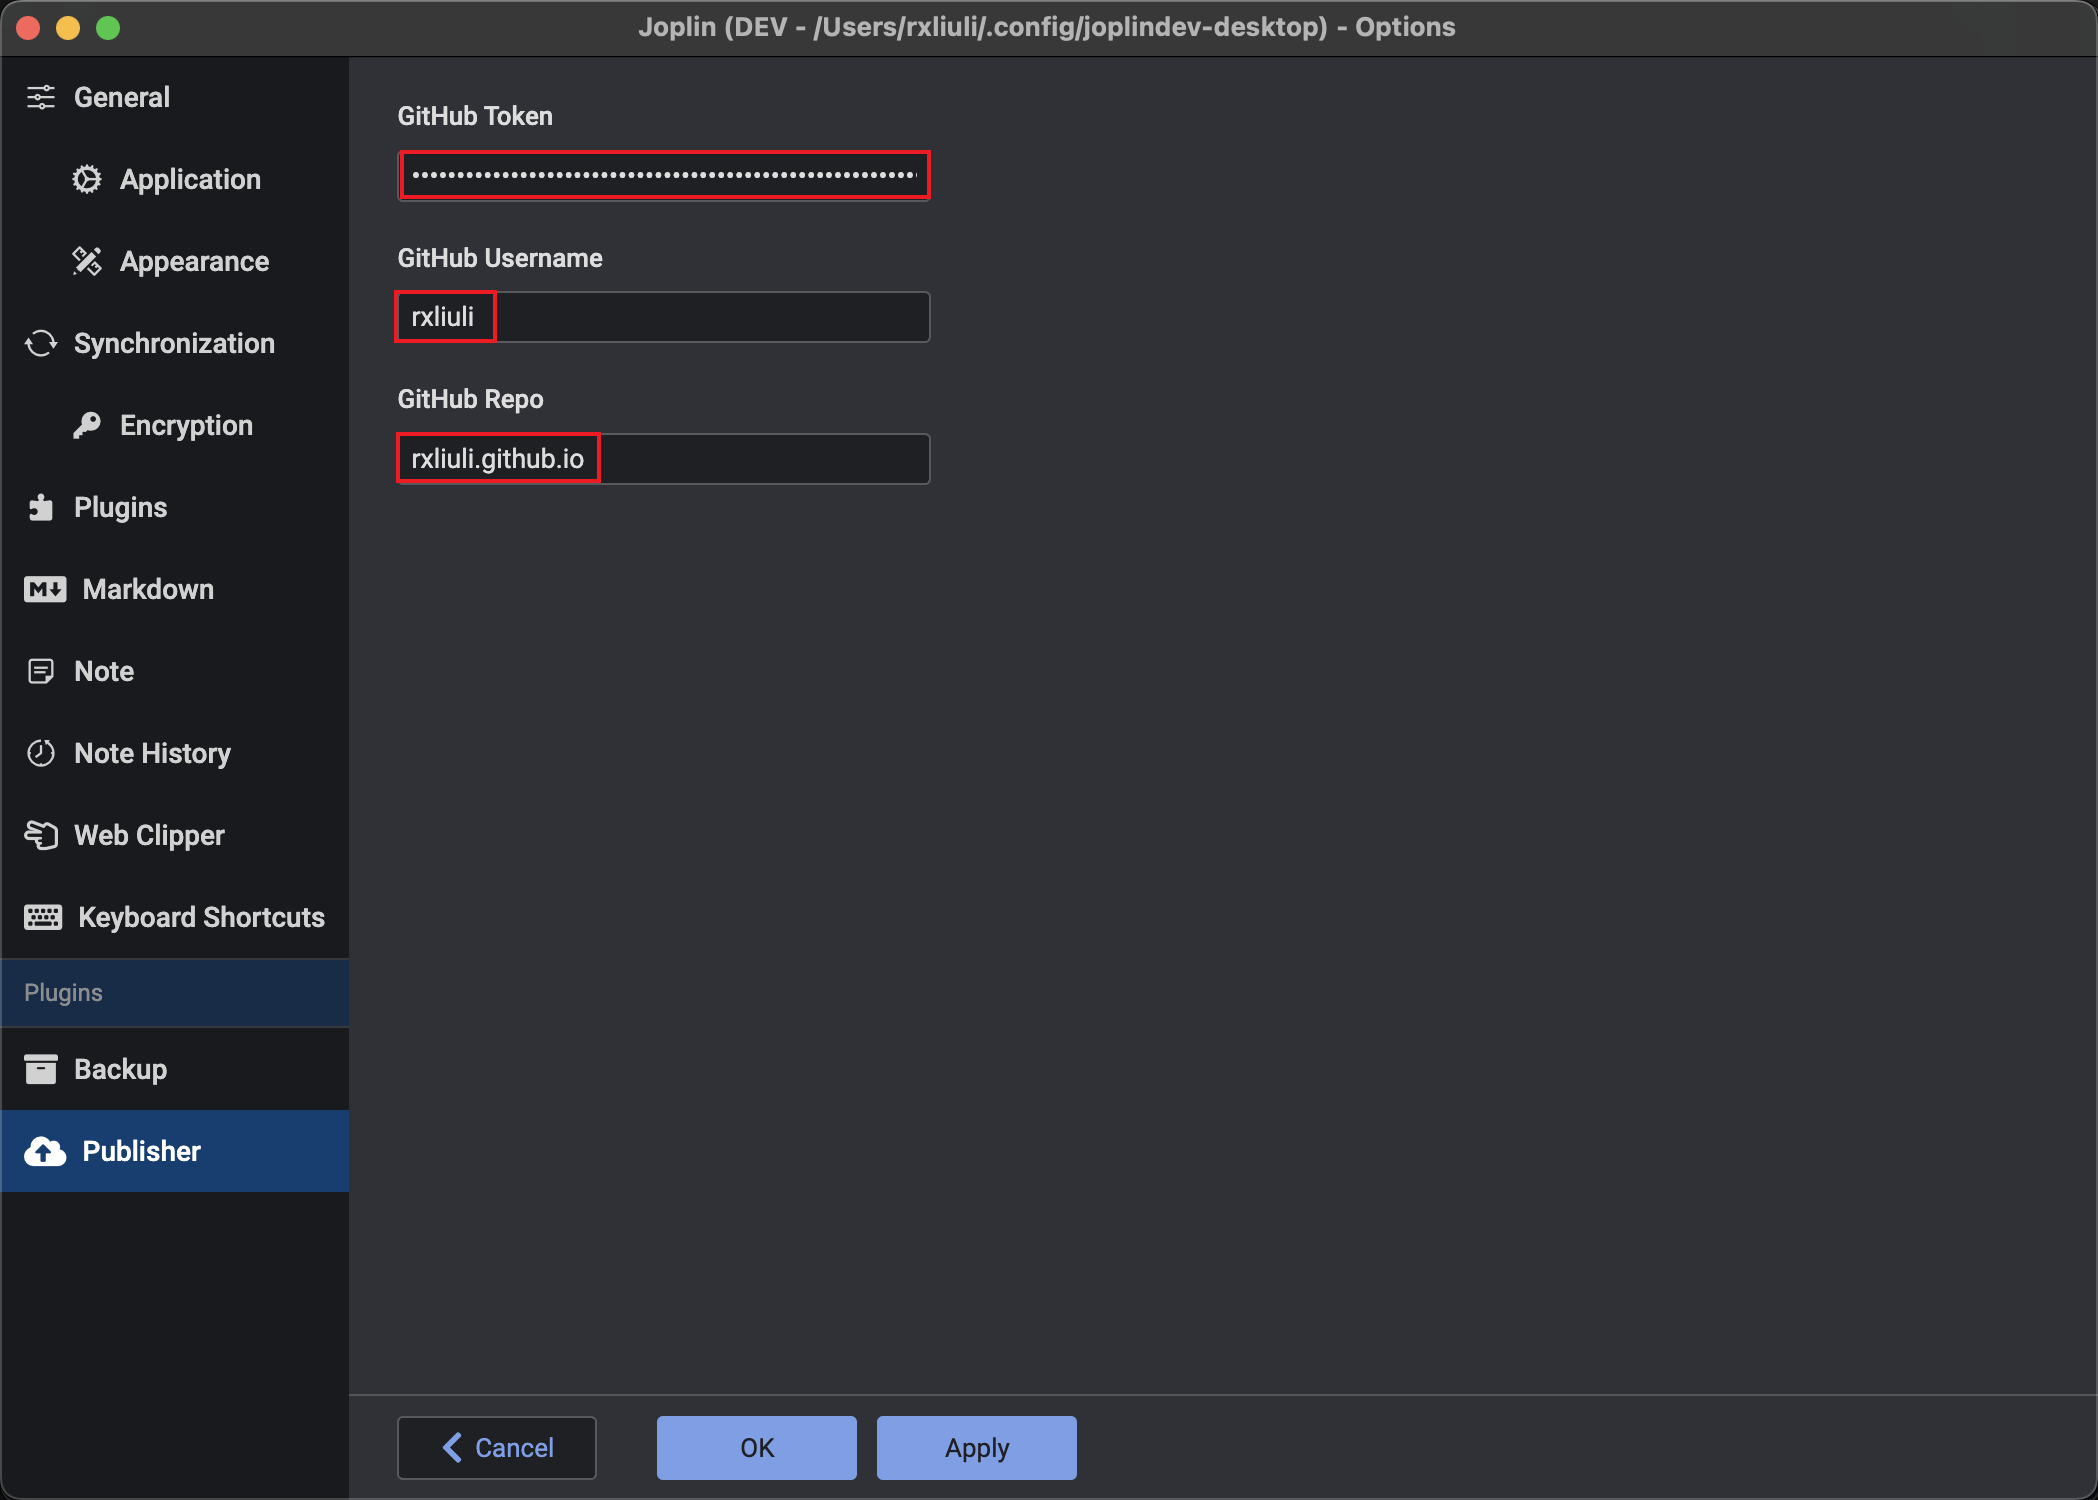
- Open Joplin > Settings > Plugins > Publisher, and set GitHub token/username/repo
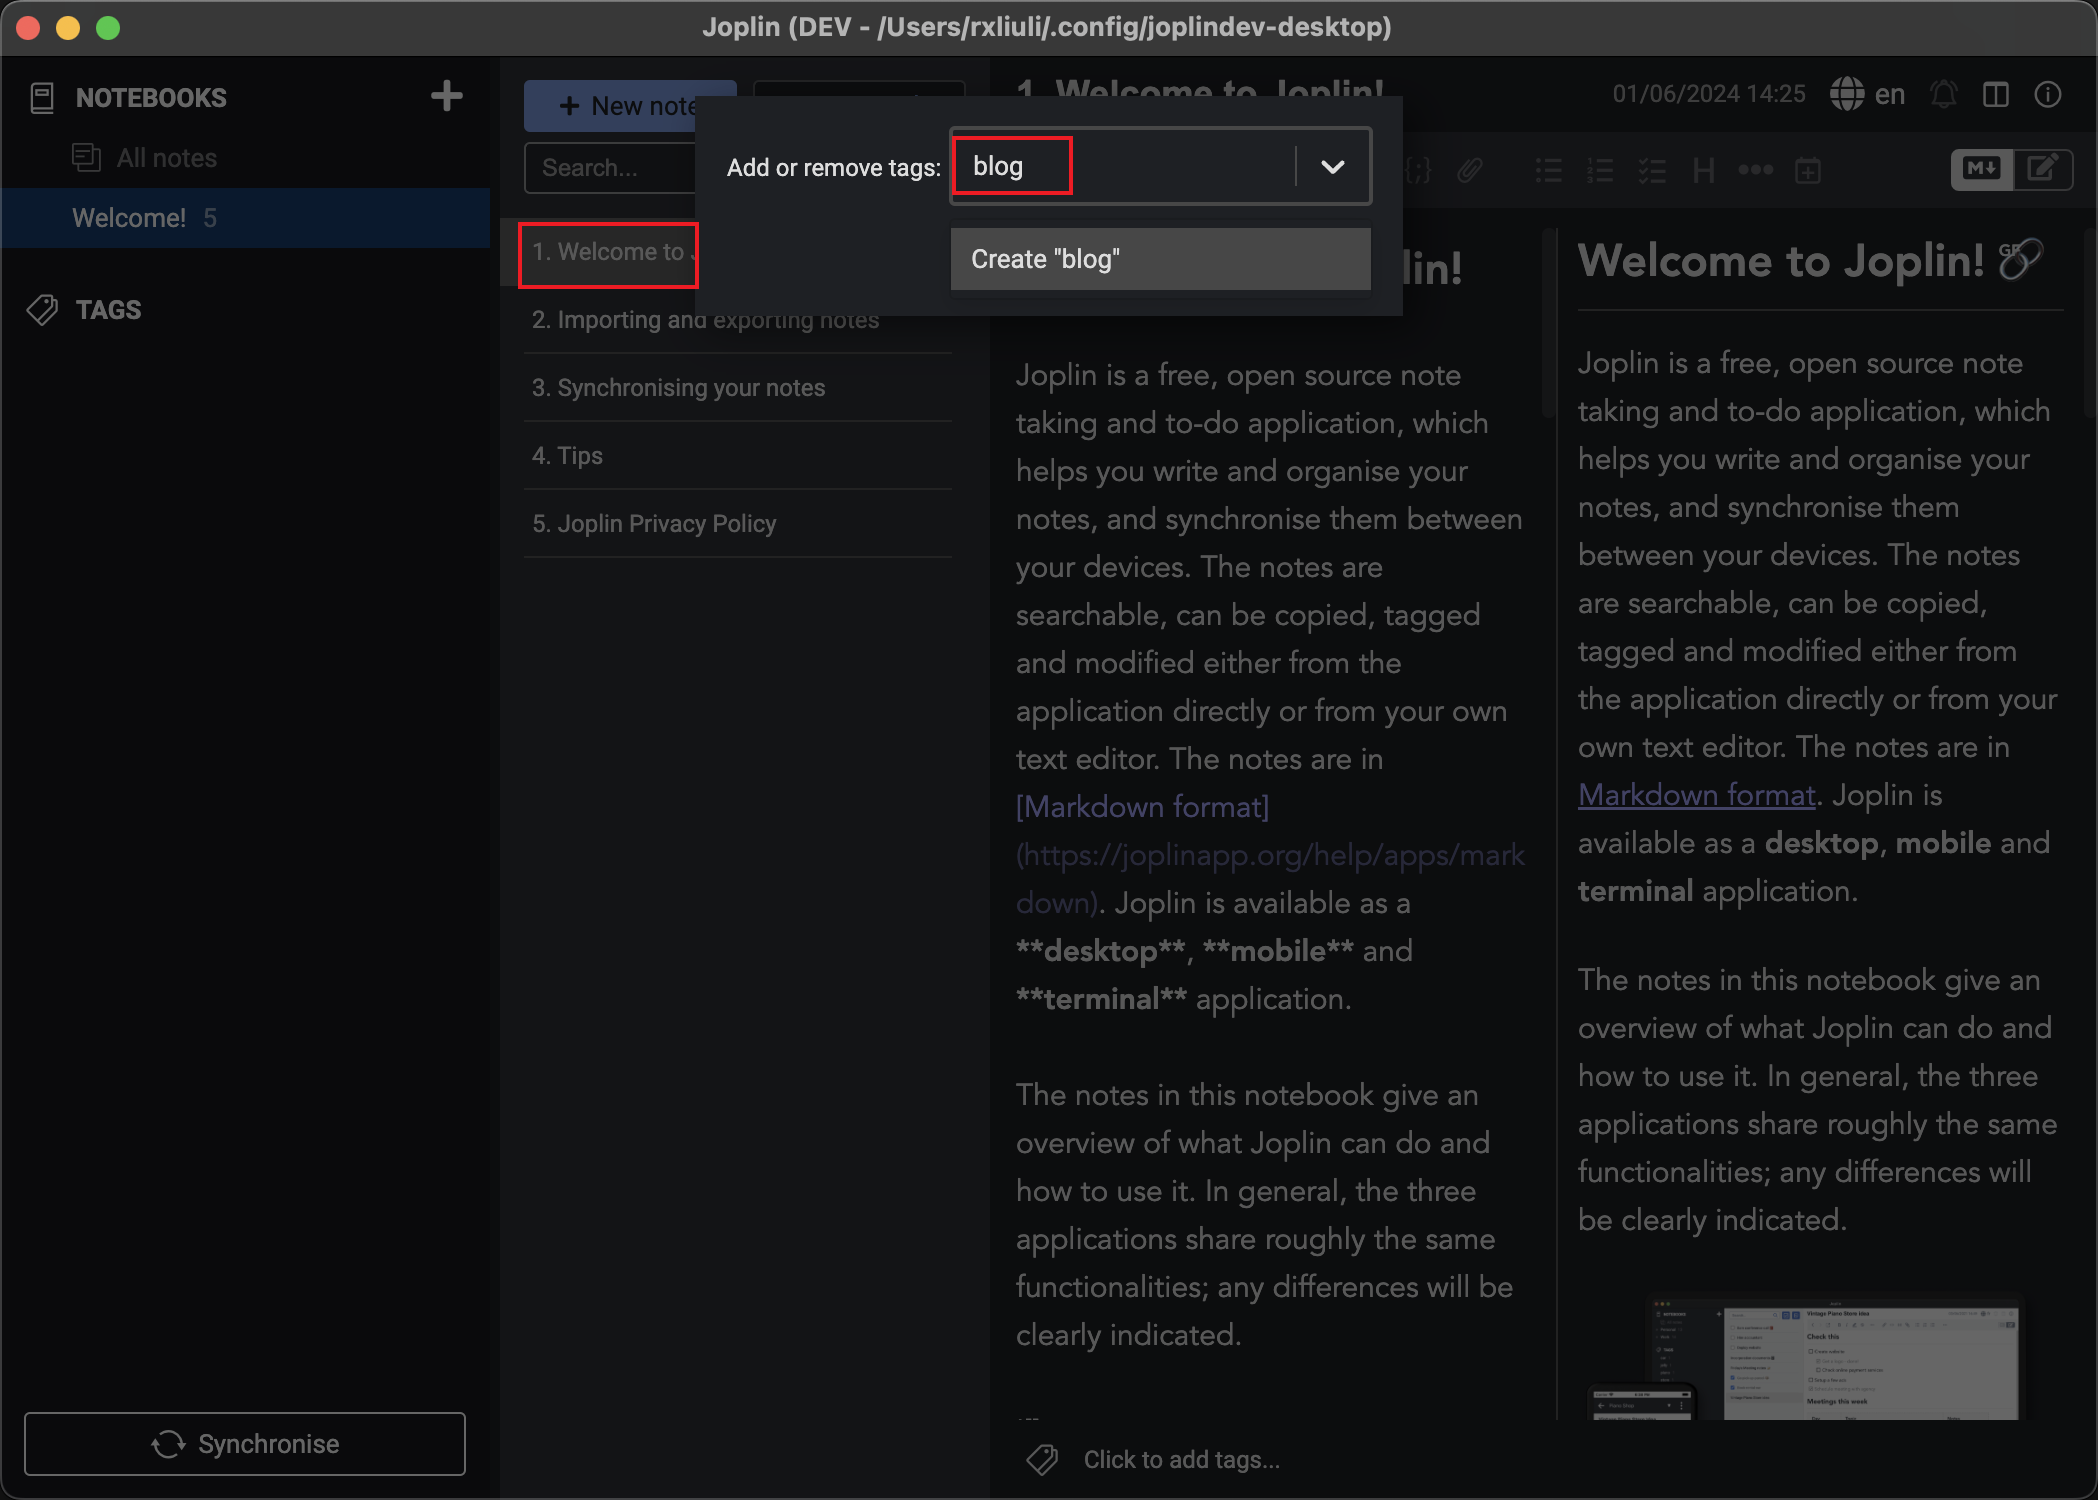
- Choose a note and add the tag blog
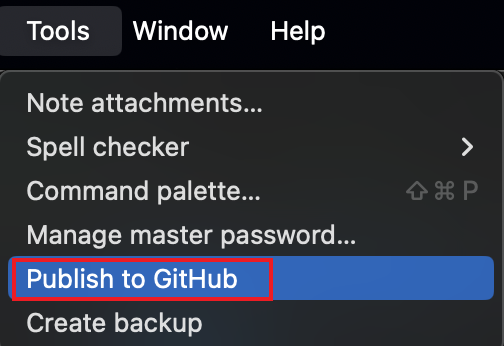
- Click Tools > Publish to GitHub to publish
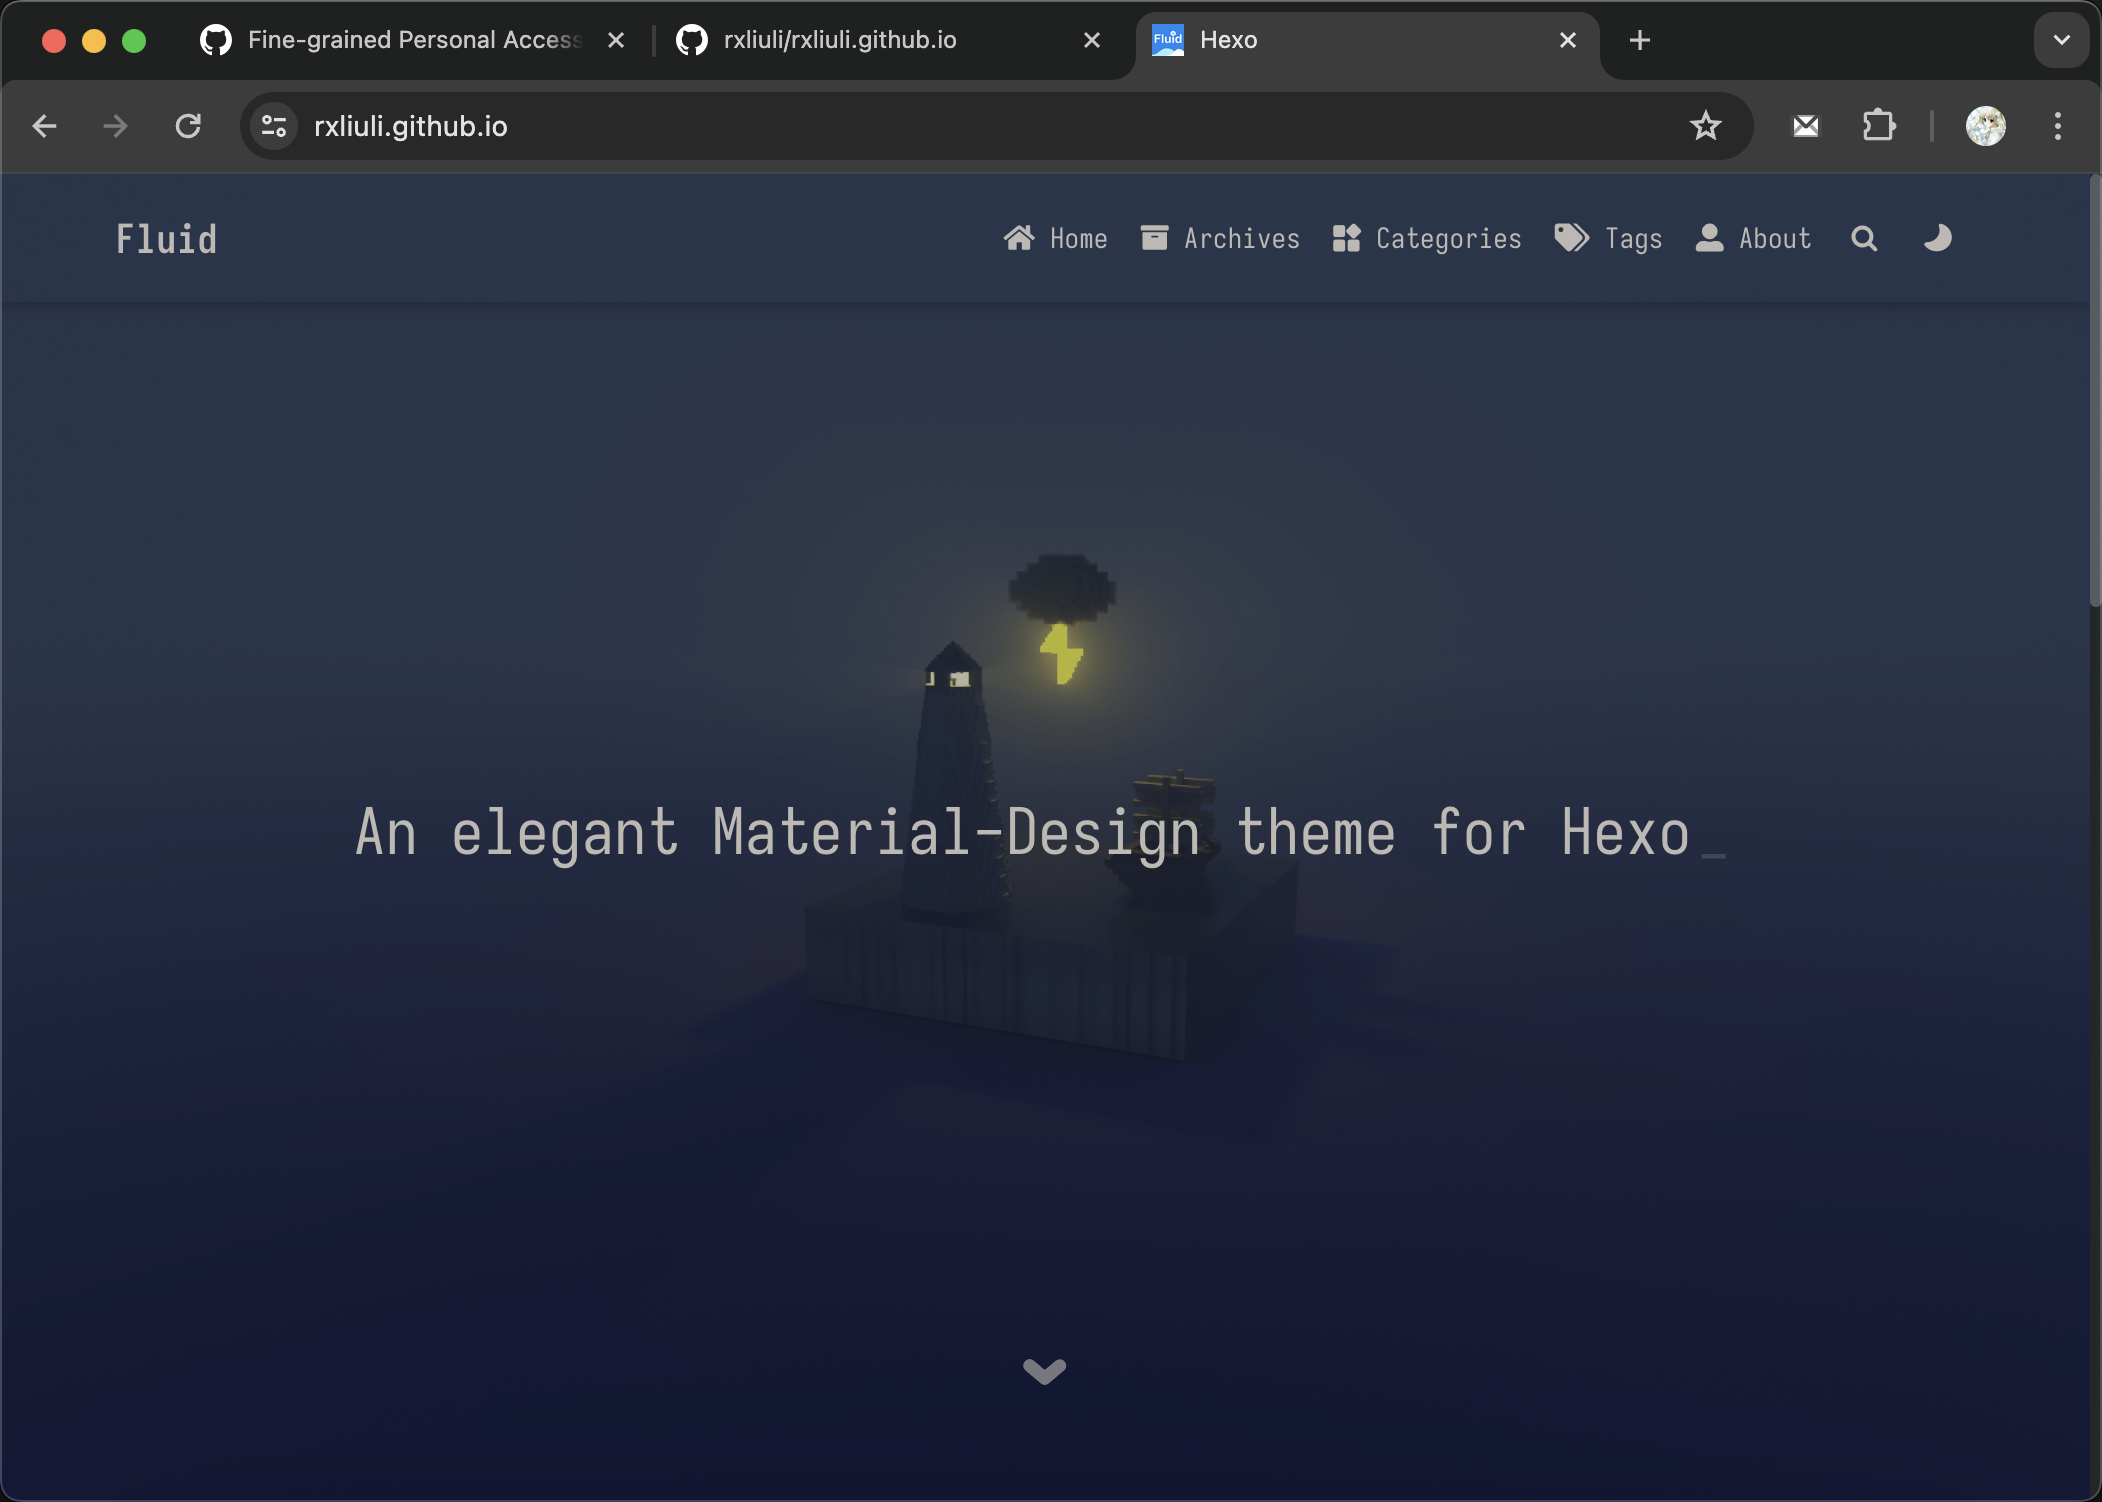
Wait for a couple of minutes, then you can visit <github username>.github.io to see your published notes.
You can continue to add the blog tag to notes you wish to publish, then run Publish to GitHub again, which will update the notes on the website.
Configuration
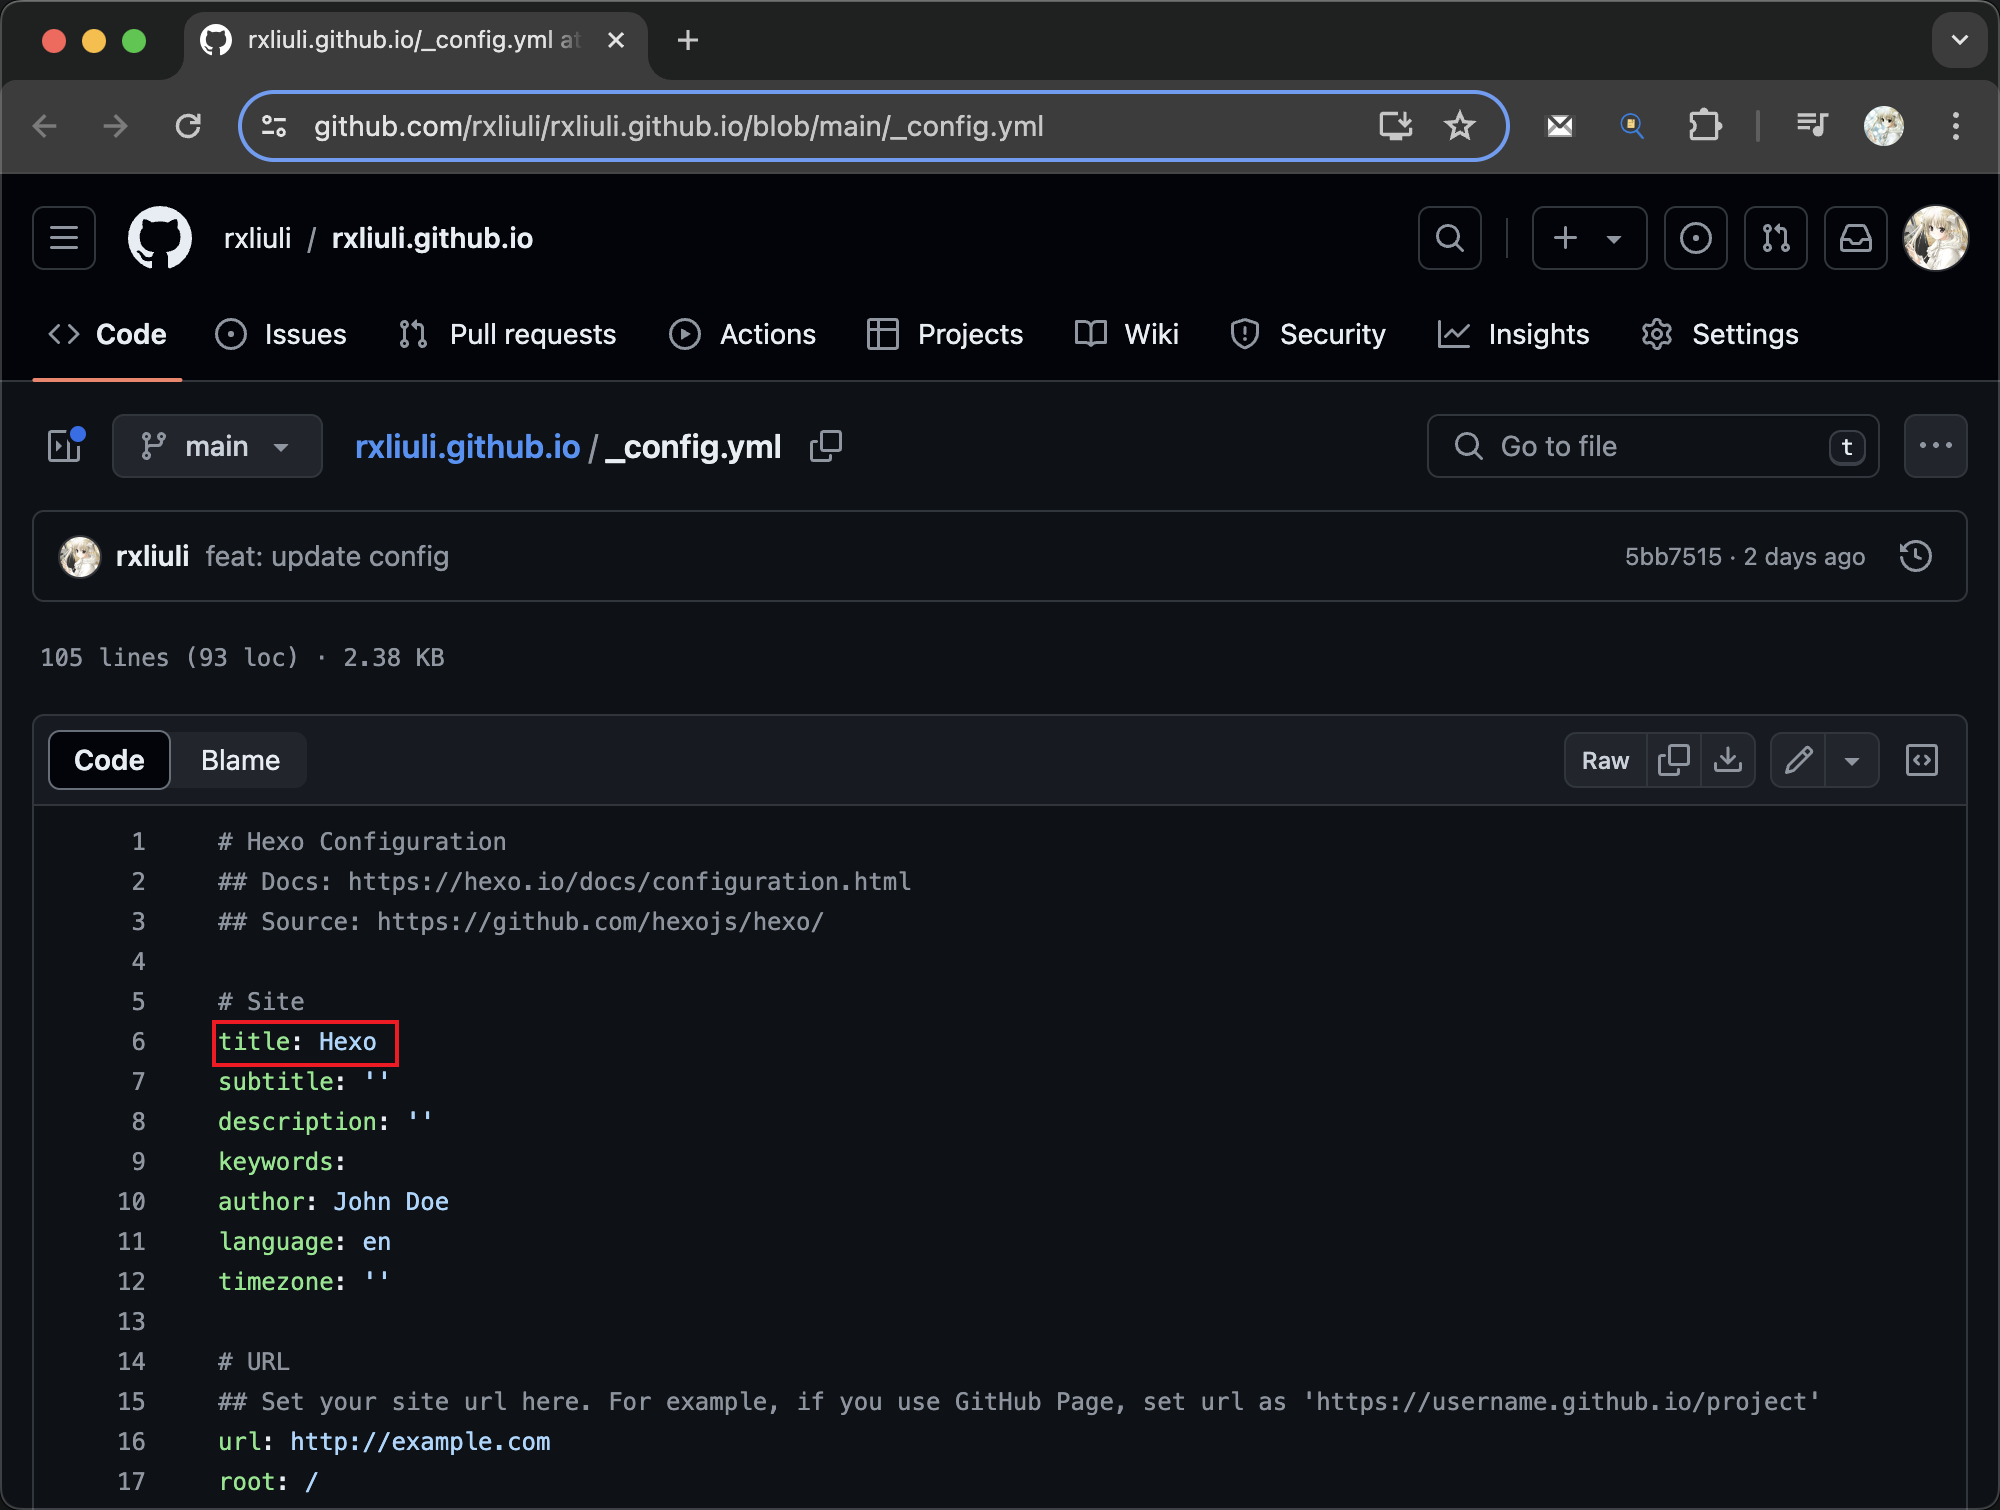
Since Hexo is used for rendering, you can configure it in the created GitHub repository. The theme currently used is Fluid, and you can modify the corresponding theme settings.
For example, if you want to change the site's title, you can modify title in _config.yml
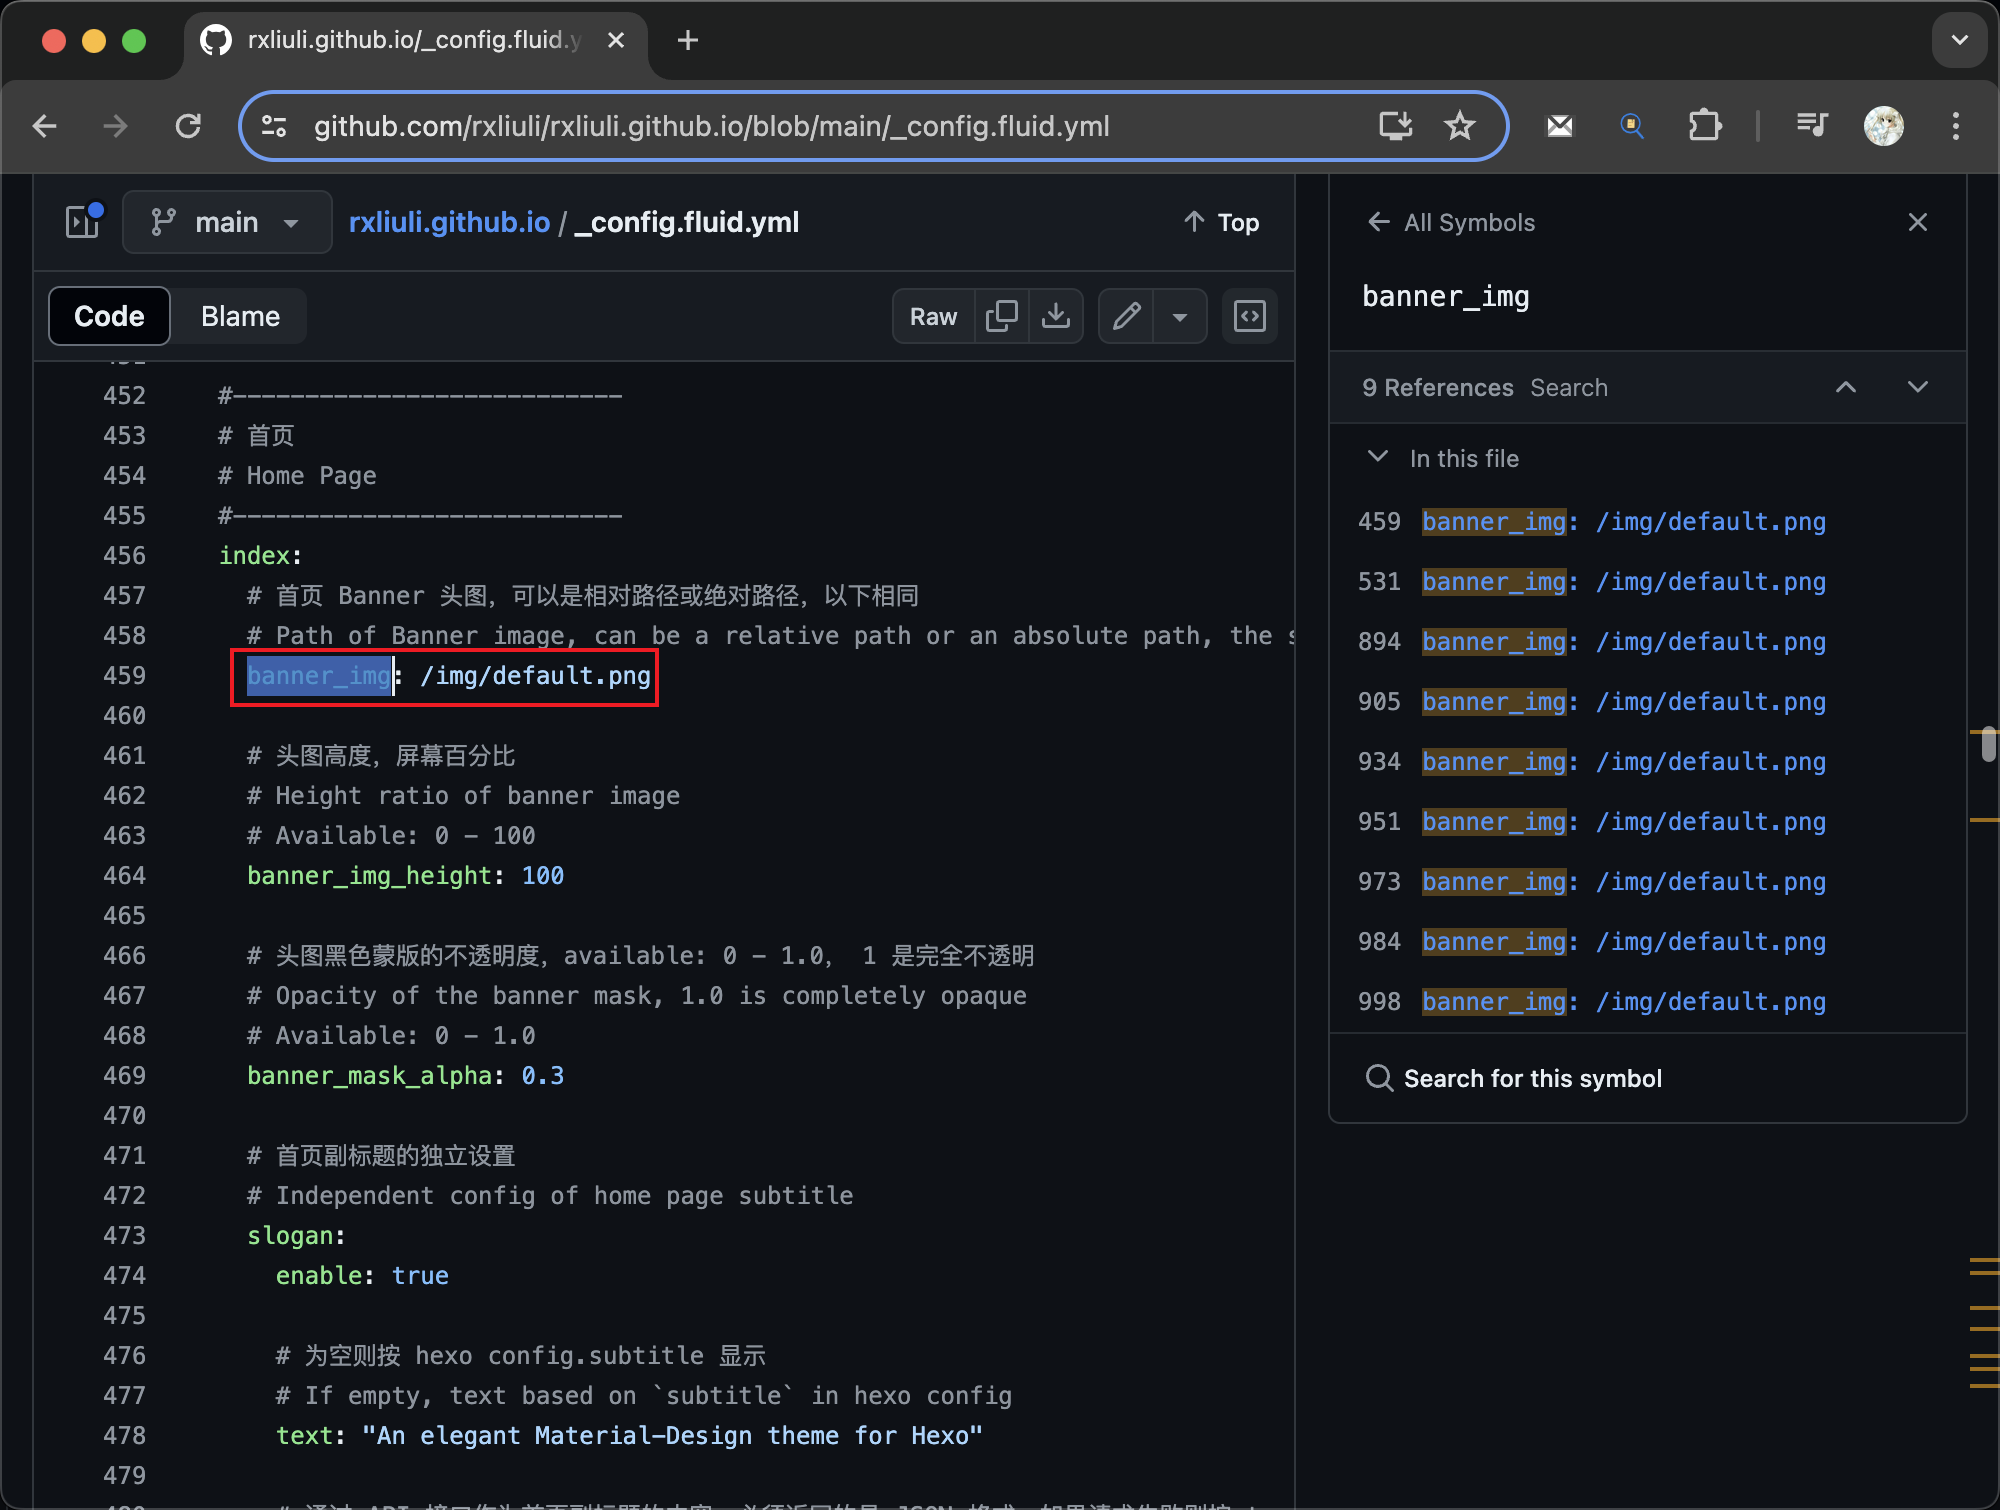
To update the background image of the homepage, you can modify index.banner_img in _config.fluid.yml
References
- Hexo documentation: https://hexo.io/
- Fluid theme documentation: https://hexo.fluid-dev.com/docs/en/guide/